Important information: This installation option is more suitable for getting acquainted with Moontrader. You can explore the platform, test the functionality and algorithms. You can also try manual trading on the tick chart. However, an important factor that prevents you from trading large volumes is the high latency from your PC to the Exchange. If the core is installed on your local computer and is connected to normal «home» internet, the Ping to the exchange is usually from 400ms to 800ms (or higher), which is suitable for position trading when the trade takes a long time. But it is NOT suitable for scalping on tick charts or trading algorithms. For the latter, the recommended ping is 5-40ms (or up to 100ms).
Tested to work only on Windows 8.1, 10 and Mac OS X: 10.15+ x86-64.
Before installing the client, you must register and get a license (register and create a license). Next, you need to go to your personal cabinet and in the Download section download the Moontrader file (go to the website) for your operating system. After downloading, run the file MoonTrader-sfx.exe (For MacOS — MoonTrader-macosx-x86_64.tar.xz) to unzip the files.
For MacOS users:
We have written a script specifically for MacOS users that will automatically download and install the latest Public version of MoonTrader on your Desktop in a folder named MoonTrader (if this name is already taken on your Desktop, the script will prompt you for a different name). To use this automated script, just copy and paste the following command into the Terminal:
bash -c
"$(curl -fsSL https://raw.githubusercontent.com/SlippingForest/MoonTrader_install/master/MacOS/install.sh)"
For public review, the code for the above mentioned script is open source and available at:
https://github.com/SlippingForest/MoonTrader_install/tree/master/MacOS
IMPORTANT! MoonTrader doesn’t assume responsibility for your use of the above script. The code is open source and open to public review. Please view the source code first and only use the above bash command if you feel comfortable doing so.
For the manual installation of MoonTrader, basic Bash skills are required:
- Download the archive to any separate folder, except the download folder (Desktop recommended)
- Open the Terminal window and navigate to the folder where you transferred the downloaded archive at step 1.
- Unpack the archive (bash command: tar -xpJf MoonTrader-linux-x86_64.tar.xz)
- Grant access rights by running the following commands in the Terminal window:
- chmod +x MoonTrader.app/Contents/MacOS/MoonTrader
- chmod +x MTCore
- xattr -cr *
After that, continue setting up MoonTrader according to these instructions.
NOTE: If something went wrong and you want to reinstall MoonTrader from scratch, in addition to the MT files folder you must also delete the profile data, which is located in the hidden MacOS profile folder ~/.config/moontrader-data. To display the hidden files, press the key combination CMD+SHIFT+.
For Windows users:
Important: We recommend that you place the MoonTrader folder in the root of any «C», «D», etc. drive. Do not place it on the desktop or in the downloads folder. There may be problems when working with the client. There must be NO Russian characters or spaces in the path to the MoonTrader files.
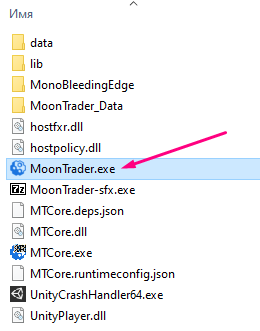
Launch MoonTrader.exe
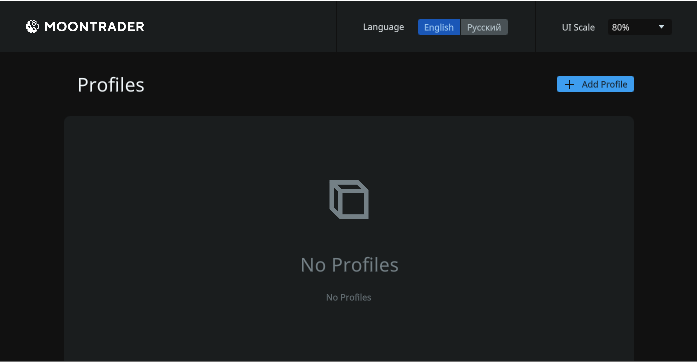
Selecting the language and scale

Creating a profile
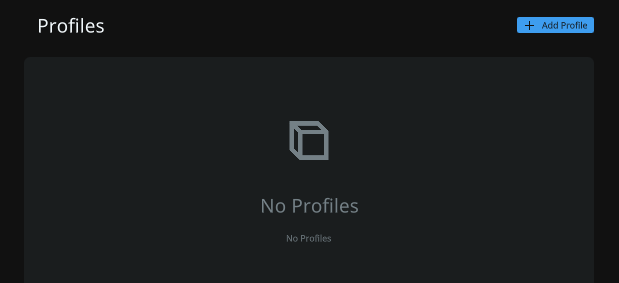
When you run the client for the first time, you need to create a profile. Click Add Profile.
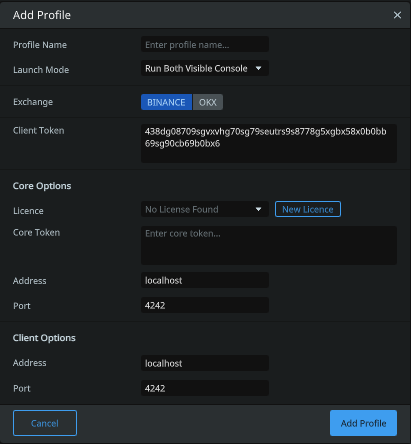
Fill in the fields in order:
General
- Profile name: any name in English letters, without spaces. You may use «_» and «-» and other characters to separate words. (for example: mt01_acc1_binance)
- Launch mode: if you are starting for the first time, leave «Run Both Visible Console«.
- Exchange: select the exchange to trade on.
- Client token: This is the password (key) to connect your client to the kernel. If this is your first time launching MoonTrader, do not touch this field, leave it as it is. The key must be mandatory, any set of characters and numbers.
Core parameters
- Click New License to bind your license to the exchange API keys.
Binance Exchange
OKx Exchange
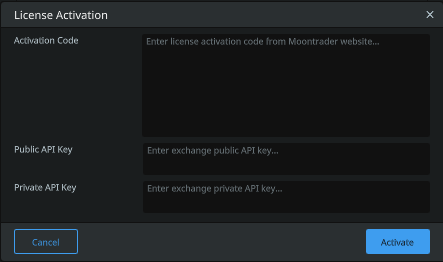
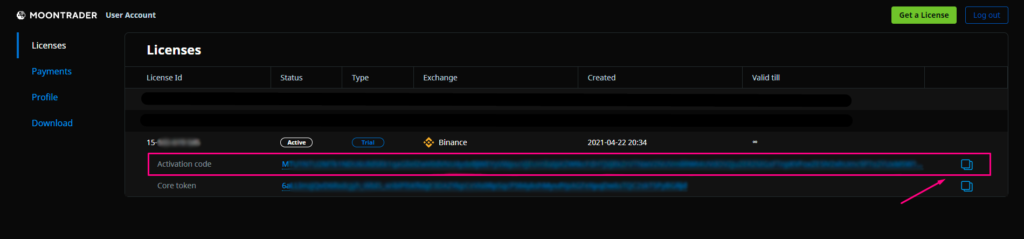
In this window you need to fill in all the fields. You can copy the activation code in your personal cabinet in the licenses section, previously clicking on the line of licenses (see screenshot below). The difference from the exchange Binance in the line «API key password», a screenshot with a description you can also find below in this article.
After copying the Activation code, paste it into the Activation code field by pressing CTRL+V. Then fill in the Public API key and Private API key fields. You can create these API keys in your personal cabinet on Binance.
Note: «How to Create an API on Binance?» — You can find it in any search engine, there are a lot of such articles.
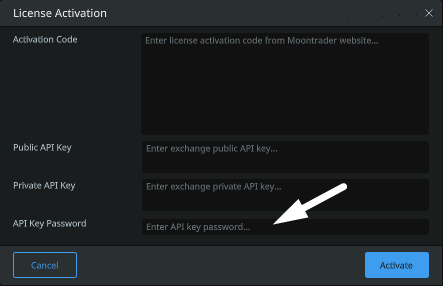
OKx Exchange — API

When you create an API on the OKx exchange, you must specify the Passphrase, the same key must be entered in MoonTrader in the «API Key Password» field.
Then click Ok and continue to fill in the fields in the main window.
- Core token: you can copy this token also in your personal cabinet in the licenses section of the Moontrader website. Core token line (see screenshot above).
- Address: write localhost
- Port: we type in 4242
Client parameters
- Address: write localhost
- Port: we type in 4242
After filling in all the fields, click Ok, so that the profile would be saved.
For the OKx exchange — you need to select the account mode!
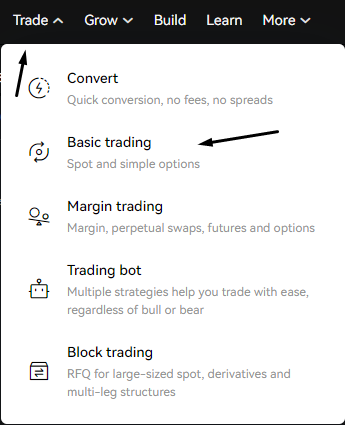
Go to the OKx website, click on «Trade» at the top and select «Basic Trading«.
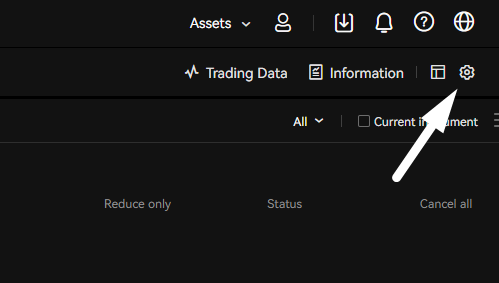
Pressing the «gear».
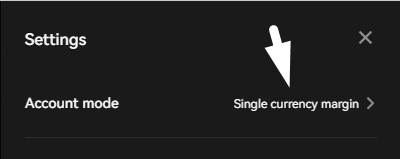
Go to «Account mode».
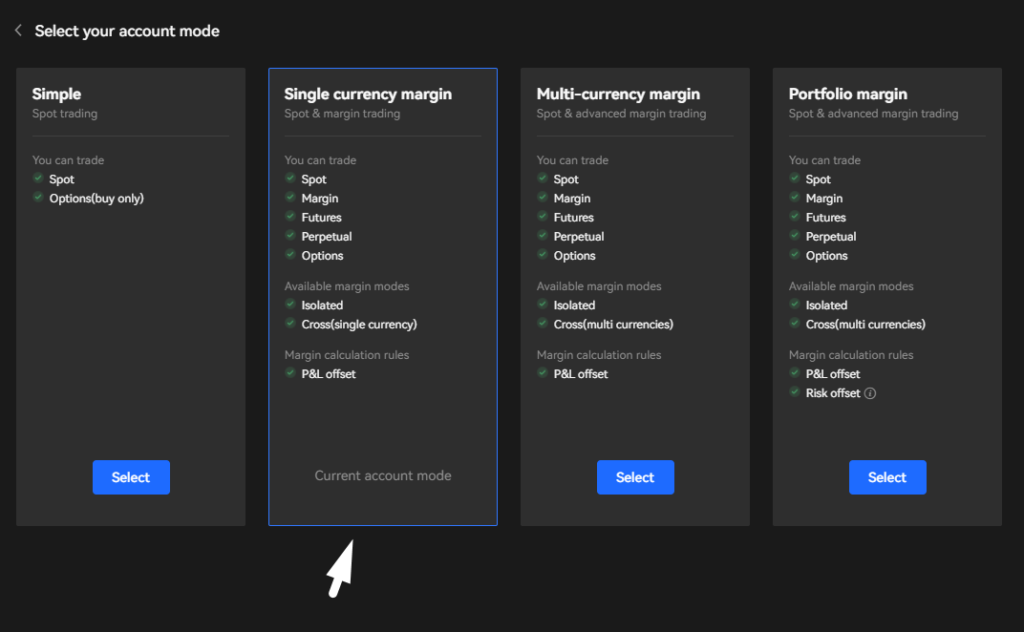
In this window, you must activate the «Single currency margin». You can now start a profile in MoonTrader.
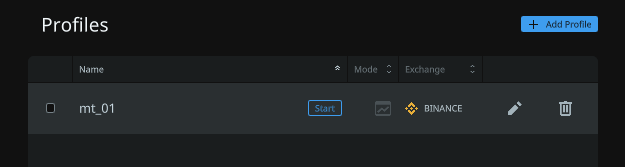
Running the profile
Now click Start and wait 2-3 minutes for Moontrader to load all the necessary data from the exchange.
If you have done everything correctly, you should have a chart loaded and your balance on the Spot or Futures market should be displayed correctly in the Balance section at the bottom left.
You can find more detailed information on all parameters in the «Client Installation» manual.
Note: It is possible to make a main profile, then when you start the client, the connection to your profile will be made automatically. To do this, you need to put a check mark in front of your profile name. If you want to change your main profile in the future, then in the open client, go to the menu and select Profiles and uncheck/change the box.
Note: If there is no connection to the server, check all client and kernel settings. If necessary, repeat the installation/setup procedure again, previously deleting all files. If after reinstalling did not help to solve the problem, you can search for causes in the «Possible problems» or write to the groups in our community Telegram.
Video instruction of two MoonTrader launch options
- Launching MoonTrader Locally and on VPS from Start to Finish (setting up the profile using client UI)
- Launching MoonTrader Locally and on VPS (setting up the profile using core console)